How to Use Snelgrove Boards
A Snelgrove board is a bee-tight division board used to manage a strong colony as two separate units on the same hive stand. It is most often used for swarm control, making increase, controlled requeening and small-scale queen rearing.
Unlike a queen excluder, a Snelgrove board does not normally allow bees to pass directly between the brood boxes. Instead, it separates the queenright and queenless parts of the colony while allowing warmth and colony odour to pass through mesh. Its doors and entrances are then used to move flying bees from one part of the hive to the other.
Used well, it can reduce swarming pressure without moving the parent hive to another site. Used badly, it can lose queens, chill brood or leave you unsure which box is queenright. Timing, entrance control and clear records matter.
What a Snelgrove board does
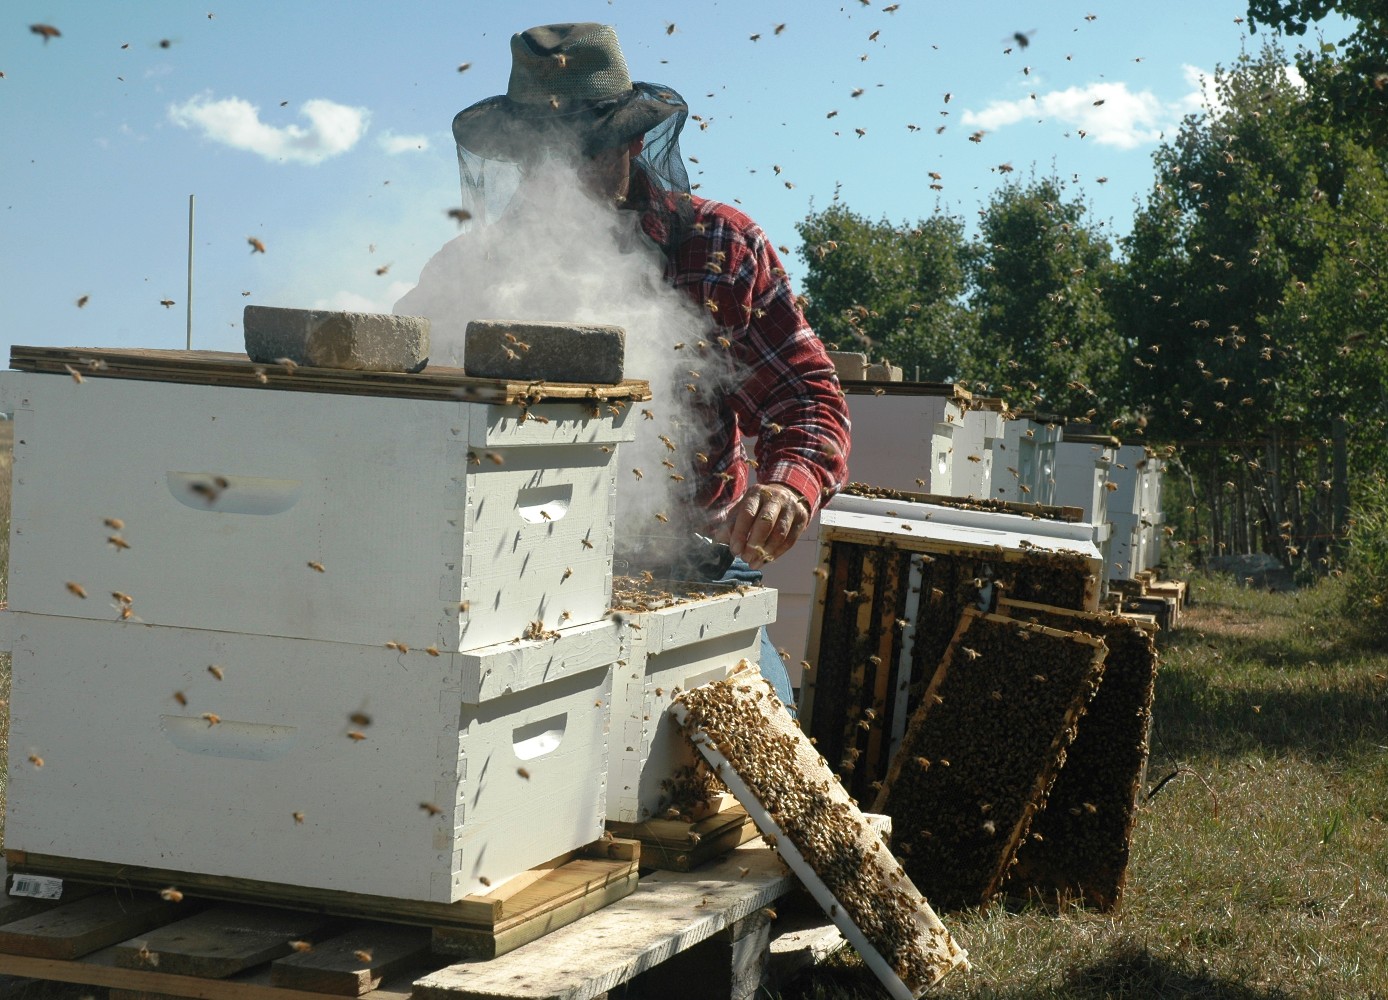
A Snelgrove board sits between two hive sections and creates two separate colonies in one stack:
- A queenright unit, usually below the board, containing the old queen.
- A queenless unit, usually above the board, containing brood and young bees.
- Mesh or screen areas that allow warmth and scent to pass between the units, while keeping bees and queens physically separate.
- Upper and lower entrances on different sides of the board, used to direct flying bees where you want them.
The practical outcome is simple: you can remove swarming pressure from the queenright part of the colony while using the queenless part to raise queen cells, produce a new queen, or make up nucs.
A Snelgrove board is not a guarantee against swarming. It is a controlled artificial swarm method. It still needs careful inspection during the main swarm season.
Snelgrove board anatomy

Designs vary, but most Snelgrove boards include:
- A wooden frame the same footprint as your hive boxes, such as National, Commercial, Langstroth or Smith.
- A bee-tight central division with mesh panels.
- Several small doors or entrances, usually arranged as upper and lower entrances on the front, back and sides.
- Sliding, hinged or rotating entrance covers.
- A rim or bee space to prevent crushing bees and to keep the board sealed.
The important point is that the board must be queen-tight and bee-tight between the two brood chambers. The entrances are for controlled external movement, not casual movement through the board.
Before using a new board, label the doors clearly. For example:
- Upper front
- Lower front
- Upper rear
- Lower rear
- Upper left
- Lower left
- Upper right
- Lower right
Not all boards have the same number of doors, so follow the maker’s layout. The principle is more important than the exact hardware: open one upper entrance for the top box, and use lower entrances to bleed flying bees down into the queenright lower unit when required.
When to use a Snelgrove board in the UK
Snelgrove boards are mainly a spring and early summer tool.
March to April
Use only if the colony is strong enough and the weather is settled. Early use may suit very strong colonies in warm areas, but avoid splitting brood during cold spells. Colonies need enough bees to cover brood in both sections.
Late April to June
This is the main period for Snelgrove swarm control in much of the UK. Colonies are expanding, drones are present, queen cells appear quickly, and mating conditions are usually more favourable.
Inspect at least every 7 days when colonies are making swarm preparations. A 10-day gap can be too long if queen cells are already advanced.
July
You can still use a Snelgrove board for making nucs or requeening, but results depend heavily on forage, drones, mating weather and stores. Late splits often need feeding and may not build strongly enough for winter without support.
Autumn and winter
Avoid using a Snelgrove board for brood separation in cold weather. Disturbing the cluster or dividing brood late in the year can do more harm than good.
Before you start
Do not begin a Snelgrove operation unless you can answer these questions:
- Is the colony strong enough to cover brood in both boxes?
- Is the queen present and preferably marked?
- Are there drones flying locally?
- Is there enough nectar and pollen coming in, or will feeding be needed?
- Can you inspect again at the correct time?
- Is the colony healthy, with no signs of brood disease?
- Do you know which entrances you will open and close?
A Snelgrove board is most reliable when used on a strong, healthy colony with a known queen.
Basic set-up for Snelgrove swarm control
This is the classic use: separating the old queen from most of the brood while keeping the flying force with her.
Aim
To mimic an artificial swarm without moving the hive. The old queen remains in the lower brood box on the original stand. The upper box contains most of the brood and young bees but no queen.
Equipment
You will need:
- Snelgrove board sized for your hive.
- Second brood box with drawn comb or foundation.
- Spare brood frames if needed.
- Queen marking kit or queen clip.
- Crownboard and roof.
- Feed, if stores are short.
- Notebook, phone or Bee Hive Tracker record ready before you start.
Day 0: set up the colony
- Find the queen.
Do not proceed until you know where she is. If she is unmarked, consider marking her before starting, provided conditions are calm enough.
- Prepare the lower queenright box.
Place the old queen in the lower brood box on the original floor. Give her:
- One frame of open brood, if possible.
- Drawn comb or foundation for laying space.
- Enough bees to cover the frames.
- Some stores, but avoid crowding her with honey-bound comb.
- Move most brood above the Snelgrove board.
Put the remaining brood frames in the upper brood box. This upper unit should contain:
- Sealed brood.
- Some open brood or eggs if you want it to raise queen cells.
- Plenty of young nurse bees.
- Stores or access to feed if needed.
Make absolutely sure the old queen is not in the upper box.
- Position supers correctly.
If supers are on the colony, they normally stay with the queenright lower unit, above a queen excluder and below the Snelgrove board. This keeps the main flying force working the crop.
A typical stack is:
- Floor
- Lower brood box with old queen
- Queen excluder
- Supers
- Snelgrove board
- Upper brood box without old queen
- Crownboard and roof
- Set the entrances.
Keep the normal lower hive entrance open at the front.
Open one upper entrance on the Snelgrove board, usually facing the rear or a different direction from the main entrance. Close all other Snelgrove doors unless your board instructions say otherwise.
- Record exactly what you have done.
Note queen location, frame movements, entrance settings, queen cells seen, stores and the next inspection date.
Door management: the key Snelgrove principle
The entrance system is what makes a Snelgrove board different from a simple split board.
The top unit produces young bees. As those bees mature and start flying, you can divert some of them down into the lower queenright unit by changing entrances. This reduces congestion and swarming pressure in the top unit while strengthening the flying force below.
The principle is:
- Bees orientated to an upper entrance return to that position.
- If you close that upper entrance and open the corresponding lower entrance, returning flyers enter the lower unit instead.
- You then open a different upper entrance for the remaining bees in the top unit.
A practical schedule is:
Day 0
- Lower front entrance open as normal.
- Upper rear entrance open.
- Other Snelgrove entrances closed.
Day 4 or 5
- Close the upper rear entrance.
- Open the lower rear entrance so returning flyers enter the lower unit.
- Open a different upper entrance, such as upper side, for the remaining top unit.
Day 7 or 8
- Inspect both units.
- If you want to bleed more bees down, repeat the principle: close the upper entrance currently being used, open the lower entrance at that position, and open another upper entrance elsewhere.
Do not overcomplicate the door work. The most common mistake is forgetting which door was changed. Label the board and record each setting immediately.
Inspecting after set-up
Lower queenright unit
Check that:
- The old queen is present or there are fresh eggs.
- She has room to lay.
- Queen cells are not being built below.
- The brood nest is not congested.
- Supers have enough space if a nectar flow is on.
If the lower unit continues to build queen cells, the swarming impulse has not been fully relieved. Make sure the queen has space and that the flying force has returned below.
Upper queenless unit
Check that:
- It is queenless.
- It has enough bees to cover brood.
- Queen cells are present if you want it to raise a queen.
- There are no too many queen cells if you are trying to avoid casts.
- Stores are adequate.
Avoid shaking frames with queen cells. Handle them gently and keep inspections brief.
Option 1: swarm control with no increase
Use this when you want to keep the colony together rather than make an extra colony.
Day 0
Set up the Snelgrove board with the old queen below and most brood above.
Day 7 to 9
Inspect the upper box. By this stage, queen cells may be sealed or nearly sealed.
If you do not want a new queen from the upper box, remove all queen cells once the youngest larvae are too old for the bees to start good emergency cells. Many beekeepers do this around day 9 after separation, but timing depends on what brood was present on day 0.
Check carefully. Missing a queen cell can result in a virgin queen emerging in the upper box.
Reuniting
Once swarming pressure has reduced and queen cells have been dealt with, you can reunite the boxes by removing the Snelgrove board.
If there is any doubt about queen status, unite cautiously using newspaper. Make sure only the queen you intend to keep remains.
Option 2: swarm control with a new queen
Use this when you want the top unit to produce a replacement queen while the old queen continues below.
Day 0
Set up the board as above, leaving suitable eggs or young larvae in the upper box.
Day 7 to 9
Inspect the upper box and select queen cells.
- Keep one good, well-positioned queen cell if you want a single replacement queen.
- Alternatively, keep two only if you have a clear reason and understand the risk of casts.
- Remove poor, damaged or excessive cells.
- Do not leave many queen cells unless you are deliberately harvesting them.
After emergence
A queen emerges about 16 days from the egg, not 16 days from when you first notice the cell. If the upper unit started emergency queen cells from young larvae, emergence may occur sooner than expected.
Once a virgin queen is expected, avoid unnecessary disturbance. Give her time to harden, fly, mate and begin laying.
In good UK weather, eggs may appear around 2 to 3 weeks after emergence. In poor weather, it can take longer. If there are still no eggs after 4 weeks, reassess carefully before assuming failure.
Choosing which queen to keep
Once the new queen is laying well, you can:
- Remove the old queen and unite the colony under the new queen.
- Keep the old queen in a nuc as insurance.
- Separate the top unit as an increase colony.
- Keep the old queen and remove the new queen if the new queen is poor.
Record emergence dates, first eggs, brood pattern and final queen choice.
Option 3: making nucs with a Snelgrove board
A Snelgrove board can be used to create a queenless upper unit that raises queen cells, which can then be used for nucs.
When to do it
Best results come during strong build-up or the main flow, when:
- Drones are mature and flying.
- Colonies are strong.
- Weather is suitable for mating flights.
- You have enough bees and stores to support the nucs.
Method
- Set up the parent colony with the old queen below the Snelgrove board.
- Put brood, nurse bees and stores above the board.
- Allow the upper queenless unit to start queen cells.
- At the correct stage, make nucs using:
- A frame with a good queen cell.
- Sealed or emerging brood.
- Young bees.
- Stores.
- Drawn comb or foundation.
- Move nucs to another site if possible, or reduce entrances and expect some drift if they remain in the same apiary.
- Feed if stores are light or weather turns poor.
If using queen cells, protect them from chilling and rough handling. Do not leave small nucs short of bees; brood needs covering, especially during cool nights.
Option 4: requeening with a Snelgrove board
A Snelgrove board can help you replace an old queen without immediately introducing a bought queen in a cage.
Method
- Keep the old queen in the lower unit.
- Let the upper queenless unit raise a new queen, or introduce a ripe queen cell from selected stock.
- Wait until the new queen is mated and laying.
- Compare brood pattern, temperament and build-up.
- Decide which queen to keep.
- Remove the unwanted queen.
- Unite the units by removing the Snelgrove board, using newspaper if there is any uncertainty.
This approach gives you insurance. If the new queen fails to mate, the old queen is still available below.
Option 5: small-scale queen rearing
For small-scale queen rearing, the upper queenless unit can act as a cell-raising colony while the original queen remains safely below.
To use it this way:
- Put grafted larvae or selected young larvae in the queenless upper unit.
- Ensure the top box is packed with young nurse bees and has ample pollen and stores.
- Keep the old queen confined below by the Snelgrove board.
- Manage entrances so the upper unit retains enough young bees but does not become overcrowded with flyers.
- Remove or protect sealed queen cells at the correct stage.
- Move ripe cells into mating nucs or prepared queenless nucs.
This is not a substitute for proper queen-rearing preparation, but it is useful for beekeepers wanting a few queens from known stock.
Frame and stores management
Good frame balance matters more than the board itself.
Lower queenright unit
The lower box needs:
- The old queen.
- Laying space.
- Enough bees.
- Some open brood to anchor the queen and bees.
- Room for expansion.
Do not leave the queen trapped below with no laying space. Congestion can restart swarm preparations.
Upper queenless unit
The upper box needs:
- Enough brood to justify the split.
- Young larvae or eggs if queen cells are wanted.
- Nurse bees.
- Adequate pollen and honey.
- Space for emerging bees.
If the upper box is short of stores, feed carefully. Small upper units and nucs can starve surprisingly quickly in poor weather, even in late spring.
Entrances, drifting and robbing
Entrance direction is central to Snelgrove work.
- Keep the main lower entrance in the original position so flying bees return to the queenright unit.
- Face the first upper entrance in another direction, commonly to the rear.
- Reduce entrances on weak nucs.
- Avoid creating too many open entrances at once.
- Watch for robbing if forage is scarce.
- If separating nucs in the same apiary, expect some flyers to drift back to the parent hive.
Moving nucs more than 3 miles away is the cleanest way to retain flying bees, but it is not always practical. If nucs stay on site, compensate by adding extra young bees and reducing entrances.
Queen cells: what to look for
Queen cell management is often where Snelgrove operations succeed or fail.
Look for:
- Open queen cells with larvae and royal jelly.
- Sealed queen cells.
- Damaged or torn-down cells.
- Multiple cells hidden along frame edges.
- Cells on the lower queenright unit, which may indicate continued swarm pressure.
For swarm control with no increase, do not leave stray cells in the upper box. For requeening or increase, choose the best cells and remove the rest.
A good queen cell is usually well fed, well shaped and positioned where it has not been crushed or chilled. Avoid relying on tiny or poorly made emergency cells if you have better options.
Common problems and fixes
The queen is in the wrong box
Cause: The queen was not found, or she moved during manipulation.
Fix: Inspect calmly and confirm queen location. If necessary, shake or brush bees through a queen excluder into the correct box, but avoid rough handling during poor weather or while queen cells are present. Record the corrected queen location immediately.
Bees pass around the board
Cause: Poor fit, warped equipment, gaps at corners or damaged rims.
Fix: Refit the board, repair gaps and check box alignment. Use only bee-safe temporary packing where needed. A Snelgrove board must be bee-tight between the two units.
The upper box does not raise queen cells
Cause: No suitable young larvae, too few nurse bees, poor nutrition or the queen is accidentally present.
Fix: Confirm it is queenless. Add a frame with eggs or very young larvae and adhering nurse bees from a healthy colony if appropriate. Ensure there are stores and pollen.
Too many queen cells are left
Cause: Insufficient cell selection.
Fix: Reinspect carefully and reduce cells to your plan. Leaving many cells can result in casts or lost virgins.
The top unit becomes weak
Cause: Too many flying bees have been bled down, poor weather, insufficient nurse bees or lack of food.
Fix: Add a frame of emerging brood with bees if disease status is clear, reduce entrance size, feed if required and stop further bleeding down.
The colony remains swarmy
Cause: The old queen still lacks space, queen cells remain below, or manipulation was done too late.
Fix: Give the lower queenright unit more drawn comb, remove unwanted queen cells, check supers are not congested and consider making a proper artificial swarm or nuc if pressure remains high.
Virgin queen fails to mate
Cause: Poor weather, lack of drones, queen lost on mating flight or disturbance.
Fix: Allow reasonable time, but do not wait indefinitely. If no eggs are present after around 4 weeks from expected emergence, consider introducing a queen, giving a test frame, or uniting with the queenright unit.
Pest, disease and legal cautions
Snelgrove work involves moving brood and bees, so disease awareness is essential.
- American foulbrood and European foulbrood are notifiable diseases in the UK. If suspected, do not move frames, make nucs or unite colonies. Contact your local Bee Inspector through the National Bee Unit/APHA.
- Do not use brood from colonies with suspicious larvae, sunken cappings, ropiness, foul smell or patchy brood of unknown cause.
- Varroa monitoring must continue. Making nucs increases the number of colonies needing checks and treatment planning.
- Clean boards between uses. Propolis and wax can stop doors closing properly.
- Avoid transferring comb between apiaries unless you are confident of disease status.
- Keep manipulations short in cool weather to avoid chilling brood.
Records to keep
Snelgrove work quickly becomes confusing if it is not recorded. Good notes prevent lost queens and missed queen cells.
Record:
- Hive ID.
- Apiary location.
- Date and weather.
- Queen status and queen mark.
- Which box the queen is in.
- Exact Snelgrove entrance settings.
- Frames moved and their contents.
- Number and position of queen cells.
- Whether cells were removed, selected or protected.
- Feeding given.
- Expected emergence date.
- Expected mating and first-egg inspection dates.
- Final outcome.
Photos are particularly useful for queen cells, brood pattern and door settings. Bee Hive Tracker can be used to attach photos to the inspection record and set follow-up reminders, which is valuable when several colonies are being managed at different stages.
Suggested follow-up timetable
Use this as a guide, adjusting for weather and what you found at the first inspection.
Day 0
Set up the Snelgrove board. Confirm queen location. Record all entrance settings.
Day 4 or 5
Change entrances if you are bleeding flying bees down into the lower unit. Check from outside unless there is a reason to inspect inside.
Day 7 to 9
Inspect both units. Manage queen cells according to your plan. Make sure the lower queenright unit has space and is not building queen cells.
Day 14 to 21
Avoid unnecessary disturbance if a virgin queen may be present. Check only if needed and handle gently.
Day 21 to 35
Look for eggs, larvae and a developing brood pattern in the unit expected to have a new queen.
Once queen status is clear
Unite, separate as a nuc, remove the old queen or continue with the new queen, depending on your aim.
Practical kit checklist
Before opening the colony, have ready:
- Snelgrove board.
- Spare brood box.
- Drawn comb or foundation.
- Queen marking kit or queen clip.
- Queen cage or nuc box if you may remove a queen.
- Hive tool and smoker.
- Feed and feeder if stores are light.
- Entrance reducers for nucs.
- Frame numbering or marking system.
- Phone or camera.
- Bee Hive Tracker, notebook or inspection sheet.
- Straps or blocks if the stack may be unstable.
When not to use a Snelgrove board
Avoid this method:
- On weak colonies.
- In cold or prolonged wet weather.
- If you cannot return for inspections at the right time.
- If you cannot reliably find the queen.
- If brood disease is suspected.
- Where entrances are so close together that severe drifting or robbing is likely.
- Late in the season unless you have a clear overwintering plan for any increase.
A simpler artificial swarm or nuc split may be safer if you are short of time or equipment.
Practical checklist before closing the hive
Before putting the roof back on, check:
- The queen is in the intended box.
- The Snelgrove board is seated flat and bee-tight.
- The correct upper entrance is open.
- Unwanted entrances are closed.
- The lower entrance remains open.
- Supers are positioned with the queenright flying force if a crop is being worked.
- Frames moved have been recorded.
- Queen cells have been noted.
- Feed is provided if stores are low.
- The next inspection is scheduled.
Sources Used
No external URLs were used in preparing this guide. It reflects established UK beekeeping practice for Snelgrove swarm control, artificial swarming, queenright and queenless brood management, and practical hive record keeping. For statutory disease guidance, consult the National Bee Unit, APHA or your local Bee Inspector.