How to Put a Swarm into a Hive
Putting a swarm into a hive is usually straightforward if you work calmly, protect the queen and give the bees a suitable cavity to settle in. The aim is simple: get the queen and the main cluster into a clean nuc or brood box, allow flying bees to join them, secure the box for transport if needed, then leave the new colony undisturbed while it orients.
Good notes matter with swarm captures. Record where the swarm came from, its estimated size, the method used, whether the queen was seen, feeding, temperament and follow-up inspections. A swarm can become a productive colony, but its origin, health and queen status are unknown until you have inspected it properly.
Why swarms are usually manageable
Swarming is the honey bee colony’s natural reproductive split. In spring and early summer, a strong colony may produce queen cells; the old queen then leaves with a large proportion of the workers to find a new home.
A clustered swarm is organised around the queen. Workers have usually filled themselves with honey before leaving the parent colony, and while they are hanging in a temporary cluster they tend to be less defensive than an established colony protecting brood and stores. That does not mean they cannot sting, but it explains why many swarms can be collected with minimal smoke and steady handling.
Scout bees search for a suitable cavity while the main cluster waits. The swarm may remain for only an hour or two, overnight, or occasionally longer. Once scouts agree on a site, the whole swarm can depart quickly, so a reachable swarm should not be left longer than necessary.
UK swarm season and common locations
In much of the UK, the main swarm season runs from late April to June, with swarms still common in July during favourable years. Cast swarms, which may contain a virgin queen, can appear later and are often smaller than prime swarms.
Typical swarm sites include:
- Tree branches, hedges and shrubs
- Fences, walls, sheds and garden furniture
- Car bumpers, wheel arches and bicycle frames
- Chimneys, eaves and roof spaces
- Ground clusters, compost heaps and long grass
- Outbuildings and cavities that may already contain comb
An exposed cluster on a branch is a swarm collection. Bees entering and leaving a hole in a wall, roof or chimney may be an established colony, which is a different job and usually needs an experienced beekeeper or specialist removal.
Safety, permission and disease precautions
Before collecting a swarm, make a few checks.
Get permission. If the swarm is on private property, ask the owner before you start. If it is on public land, near a road, above a pavement, close to power lines or in another hazardous location, involve your local beekeeping association or an experienced swarm collector.
Wear suitable protection. Even calm swarms can sting if crushed or disturbed. At minimum, wear a veil. Gloves, a bee suit and boots are sensible if you are new to swarm collection or if the bees are awkwardly placed.
Use ladders cautiously. A swarm is not worth a fall. If the cluster is high, use a secured ladder, have someone footing it, and do not overreach. If it cannot be collected safely, walk away and call for help.
Be alert for disease later. A clustered swarm has no brood to inspect at capture, so you cannot assess brood disease immediately. Once brood is present, look for signs of American foulbrood or European foulbrood, including sunken or perforated cappings, ropiness, unusual larval colour, twisted larvae or a patchy, suspicious brood pattern. If you suspect notifiable disease, isolate the colony and contact the National Bee Unit or your local bee inspector. Do not move suspect frames into other colonies.
Equipment to take
For a routine swarm collection, take:
- A clean nuc box or brood box with a floor, crownboard and roof
- Frames with foundation, plus drawn comb if you have clean, disease-free comb available
- A travel screen, foam entrance block or ventilated closure for transport
- A white sheet or light-coloured cloth
- Secateurs, loppers or pruning saw for small branches
- Bee brush, feather or soft leafy twig
- Smoker and fuel, used sparingly
- Ratchet strap or hive strap
- Protective clothing and a spare veil for a helper
- Ladder only if it can be used safely
- Feeder and syrup for later use if needed
- Notebook or a record-keeping app such as Bee Hive Tracker for collection details and follow-up tasks
Choose the box size to match the swarm. A small cast may be better in a nuc, where it can keep warm and defend the entrance. A large prime swarm needs a full brood box, especially on a nectar flow when comb building and laying can begin quickly.
Preparing the hive or nuc
Use clean equipment. A swarm is more likely to stay in a box that smells suitable, and drawn brood comb can help, but only use comb from healthy colonies with no disease concern. Do not use old, dirty or suspect comb just because it attracts bees.
For a nuc, fit enough frames to fill the box. For a full brood box, use frames with foundation and, if available, one or two good drawn combs near the centre. Avoid leaving large empty spaces where the bees can build wild comb.
Place the hive or nuc as close to the cluster as practical. If possible, put it directly beneath the swarm. A sheet leading up to the entrance helps bees walk in and makes it easier to see where the queen and workers are moving.
Reduce the entrance after hiving, especially for a small swarm, but make sure there is enough ventilation during transport and warm weather.
Assess the swarm before choosing a method
Look at the cluster before you disturb it.
Size. A small cluster may only cover two or three frames. A football-sized cluster may need a nuc or small brood box. A large swarm can fill most of a full brood box.
Accessibility. A low branch, fence post or shrub is usually easy. A swarm in a chimney, roof space or high tree is not a simple beginner job.
Temperament. Calm bees hanging tightly are ideal. Bees running, pinging the veil or flying heavily may have been disturbed, may be queenless, or may not be honey bees. If in doubt, ask for help.
Queen status. If you see the queen, your priority is to get her safely into the box. Most of the time you will not see her; collect the main cluster and watch the bees’ behaviour. Workers fanning at the entrance with their Nasonov glands exposed is a good sign that the queen is inside or that the box has become the focus of the swarm.
Method 1: letting the swarm walk in
This is the gentlest method and works well when the cluster is low and the box can be placed close by.
- Put a sheet under the cluster and set the hive or nuc on it with the entrance open.
- If the cluster is touching the box or can be gently lowered towards it, leave the bees to explore.
- Brush or encourage a few bees towards the entrance if necessary.
- Step back and watch. If the queen enters, workers will usually begin fanning and the cluster will stream into the box.
- Leave the box in place until most flying bees have joined, often best done near dusk if you need to move it.
This method takes patience, but it reduces crushing and gives the swarm a chance to settle naturally.
Method 2: shaking a swarm into a box

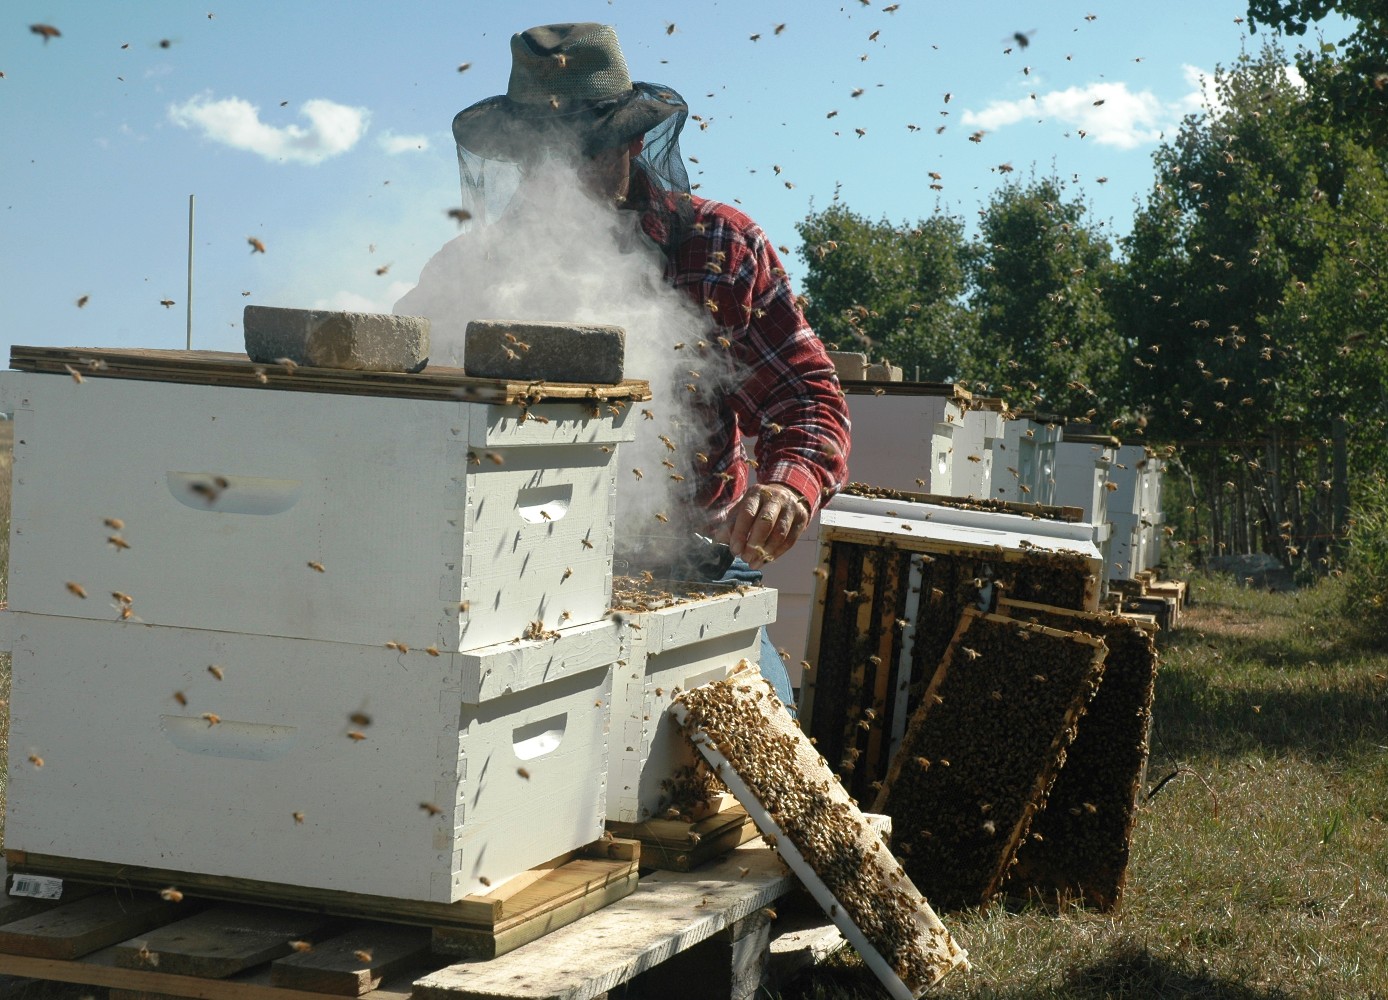
Shaking is the most common approach for a cluster hanging from a branch, hedge or object.
- Place the open nuc or brood box directly under the swarm.
- Remove several centre frames temporarily to create space, keeping them close to hand.
- Give the branch or support a firm, sharp shake so the main cluster drops into the box.
- Replace the frames slowly and carefully, avoiding crushing bees.
- Put on the crownboard or lid, leaving the entrance open.
- Watch the bees. If they begin fanning at the entrance and flying bees are entering rather than leaving in a cloud, the queen is probably inside.
- If the cluster reforms in the original place, the queen may still be there. Shake or brush that cluster into the box again.
Use very little smoke. Heavy smoking can scatter the bees and make them harder to collect.
Method 3: cutting the branch
If the swarm is on a small branch that can be removed safely, cutting the branch can be very effective.
- Hold the branch securely or have a helper support it.
- Cut cleanly with secateurs or loppers.
- Lower the branch into the open hive or nuc.
- Gently shake or brush bees from the branch into the box.
- Remove the branch if it prevents frames sitting correctly.
- Close the box and leave the entrance open for returning bees.
Do not leave bulky branches inside the hive if they stop frames hanging properly or create wild-comb space.
Method 4: collecting a ground swarm
Ground swarms need prompt attention because they are vulnerable to weather, pets, people and predators.
Place a nuc or brood box beside the cluster, with a sheet forming a ramp to the entrance. Gently scoop or brush bees towards the entrance, or place the box over part of the cluster if practical. Once enough bees and the queen are inside, the rest will usually follow.
Be especially careful not to crush the queen, as she may be on the ground rather than deep in the cluster.
Bait hives and delayed collection
A bait hive is a prepared cavity used to attract scout bees and incoming swarms. It is most useful before swarming begins, but it can also help when a cluster is difficult to reach and you are able to leave a box nearby.
A good bait hive is dry, secure, around the volume of a brood box, and contains frames. A small amount of old brood comb or a tiny amount of lemongrass oil can attract scouts, but do not overdo scent lures.
If a swarm moves into a bait hive, wait until evening when flying has stopped, close the entrance with ventilation, strap the box securely and move it to its new site. Open the entrance as soon as it is in position.
Check bait hives regularly. If bees have started building comb, install them properly before they become difficult to manage.
Transporting the swarm
Once the queen and most bees are inside, leave the box at the collection site until late afternoon or evening if possible, so flying bees can return. Then:
- Close the entrance securely with ventilation
- Strap the floor, box and roof together
- Keep the box upright and level
- Keep it cool and shaded
- Do not leave it closed in a hot car or in direct sun
- Drive smoothly and avoid unnecessary delays
A newly collected swarm can usually be moved to your apiary immediately because it has not yet oriented to the new hive site. If you leave it in place for several days, the bees may orient there and moving it later becomes more complicated.
At the destination, place the hive on its stand, open the entrance, reduce it if necessary and leave the bees alone.
First 48 hours after hiving
Do not carry out a full inspection straight away. The bees need time to accept the box, start drawing comb and settle around the queen.
For the first day or two:
- Keep the entrance reduced, especially for a small swarm
- Make sure the hive is level, dry and shaded from extreme heat
- Avoid repeated opening and disturbance
- Check from outside that bees are flying normally and bringing in pollen
- Feed only if needed
Feeding depends on conditions. If there is a good nectar flow and the swarm has drawn comb, they may not need syrup. If the weather is poor, the swarm is small, or they are on foundation and need to draw comb, offer light syrup in modest amounts. Avoid spills and large exposed feeders, which can start robbing.
Many beekeepers wait until the swarm has been hived for around 24 hours before feeding, particularly with swarms of unknown origin. Use clean feeders and record what you gave.
Follow-up inspections
Your first proper inspection should be gentle and purposeful. The timing depends on whether the swarm contains a laying queen or a virgin queen.
After 3 to 5 days
A quick check may be enough. Look for:
- Bees still occupying the box
- Comb being drawn
- Adequate food
- Normal, calm behaviour
Avoid pulling the colony apart unless something looks wrong.
After 7 days
In a prime swarm with a mated queen, you may see eggs or young larvae by now. If you do, the colony is queenright and starting well.
If there are no eggs, do not panic. A cast swarm may contain a virgin queen, which needs time to mate and begin laying. Weather can delay mating.
After 14 to 21 days
By this stage, look for:
- Eggs or larvae
- A developing brood pattern
- Sufficient space for the queen to lay
- Adequate stores
- Any abnormal brood symptoms once brood is sealed
If there are still no eggs after three weeks, investigate queenlessness. Options include uniting with another colony, introducing a queen, or giving a test frame of eggs from a healthy colony if you are confident about disease status and the receiving colony’s condition.
After 4 to 6 weeks
Assess colony strength, brood pattern, temperament and stores. Add space if needed. A strong swarm can expand rapidly and may need additional frames or a super during a good flow.
Varroa management for a captured swarm
A swarm arrives with adult bees and no sealed brood, which creates a useful varroa control opportunity. Mites on a newly hived swarm are exposed on adult bees until the colony has sealed brood again.
Consider a varroa treatment during this broodless window if it fits your management plan. In the UK, use only authorised products and follow the label instructions. Record the product, batch if relevant, date, dose and weather conditions.
If you do not treat immediately, monitor mite levels once brood is established and act according to your integrated pest management plan. Do not assume a swarm is mite-free simply because it is new.
Common problems after hiving a swarm
The bees leave the box
Absconding can happen if the box is too hot, too exposed, too large for a small swarm, repeatedly disturbed, short of comb guides, or unattractive. Clean equipment, suitable volume, a reduced entrance and a little drawn comb can help. Avoid shaking the hive around or inspecting too soon.
No eggs are found
If it is a prime swarm, eggs are often present within a week. If it is a cast, the queen may still need to mate. Give the colony time, but set a clear follow-up date. If there are no eggs after about three weeks, treat it as a queen problem.
The swarm is very small
Small casts can struggle. Put them in a nuc, reduce the entrance, feed carefully in poor weather and keep them warm. Later in the season, a weak colony may need uniting rather than taking into winter.
The bees are defensive
Some swarms are lively from the start; others become defensive as brood develops. Record temperament at every inspection. If they remain difficult to handle, consider requeening from calmer stock once the colony is established.
Robbing or wasp pressure starts
Reduce the entrance, avoid syrup spills and keep inspections short. Small swarm colonies are particularly vulnerable in late summer.
Suspicious brood appears
Do not shake bees into other colonies or redistribute frames. Take clear photographs, close the hive, mark it in your records and contact the National Bee Unit or local bee inspector for advice.
What to record
Swarm records are valuable because the colony’s origin is uncertain. In Bee Hive Tracker or your usual inspection notes, record:
- Date and time of collection
- Original swarm location, including postcode or GPS if useful
- New apiary location
- Estimated swarm size
- Collection method: walk-in, shake, cut branch, ground swarm, bait hive or night collection
- Box used: nuc, National brood, 14 x 12 or other
- Number and type of frames: foundation, drawn comb or mixed
- Whether the queen was seen, marked or only assumed present
- Temperament during collection
- Weather and forage conditions
- Feeding given, including syrup ratio and amount
- Entrance reduction and transport details
- Follow-up inspection dates
- Eggs, brood and queen status at later inspections
- Varroa monitoring and treatment details
- Any photos of the cluster, queen, brood or equipment
This record helps you make better decisions later about feeding, requeening, uniting, disease concerns and varroa control. It is especially useful in a busy swarm season when several boxes may look similar.
Practical first-eight-weeks checklist
Day 0: Collect the swarm, hive it in clean equipment, reduce the entrance, move it safely if needed and record the capture.
Day 1 to 2: Check from outside. Confirm bees are settled and flying. Feed lightly only if conditions or equipment justify it.
Day 3 to 5: Make a brief check for comb building, stores and general behaviour.
Day 7: Look for eggs if the colony is calm and conditions are suitable. Record queen status.
Day 14 to 21: Confirm brood development or investigate possible queenlessness if no eggs are present.
Week 4 to 6: Assess brood pattern, temperament, stores and space. Add room if the colony is expanding strongly.
Week 6 to 8: Review varroa monitoring, treatment records, queen performance and whether the colony is strong enough for the next stage of the season.
When to call for help
Hand the job to someone more experienced if the swarm is:
- High in a tree or above unsafe ground
- In a chimney, roof space, wall cavity or loft
- On a busy road, school site or public building
- Near power lines or railway property
- Not clearly honey bees
- Already established with comb and brood
- Causing public concern beyond your ability to manage safely
Local beekeeping associations often maintain swarm collector lists. The BBKA and National Bee Unit are useful starting points for UK guidance.
Final advice
The key to hiving a swarm is to secure the queen, keep the bees calm and give them a suitable home. Most exposed swarms can be collected with a nuc or brood box, a sheet, patient handling and minimal smoke. Once hived, resist the urge to keep checking them. Let them settle, then inspect methodically for eggs, brood, stores, temperament and disease signs.
A swarm is an opportunity, but it is also an unknown colony. Careful follow-up and accurate records turn a quick collection into sound beekeeping management. Logging the capture and inspections in Bee Hive Tracker gives you a clear history when you later make decisions about feeding, varroa treatment, requeening or preparing the colony for winter.
Sources Used
- https://www.nationalbeeunit.com
- https://www.bbka.org.uk
- https://www.gov.uk/government/organisations/animal-and-plant-health-agency