How to Spot Queen Cells
Queen cells are one of the most important things to recognise during a hive inspection. They tell you whether a colony may be preparing to swarm, replacing a failing queen, or trying to recover after becoming queenless.
The quickest way to interpret them is to look at four things together: where the cells are, how many there are, whether they are charged with an egg or larva, and what else is happening in the brood nest. Empty queen cups are common and often harmless. Large, charged, peanut-shaped cells, especially in numbers around the lower edges of brood frames, usually mean the colony is moving into swarm preparation.
In the UK, this matters most from April to June, although warm springs, strong nectar flows and late-season congestion can bring queen cells earlier or later. A good decision depends on accurate inspection, calm handling and clear records, including the stage of the cells and your planned re-check date.
What a queen cell looks like
A true queen cell is larger than a worker or drone cell and points downwards. It often looks like a rough peanut shell hanging from the comb. Queen cells can be open, with a larva and royal jelly visible inside, or sealed with a textured wax cap.
Do not confuse these with empty queen cups. Queen cups are small acorn-shaped cups that colonies may keep on the comb throughout the season. They only become significant when they are “charged” with an egg or larva and the bees are actively drawing them out into full queen cells.
During inspection, check:
- The lower edges of brood frames
- The side bars and corners of frames
- The face of the comb within the brood nest
- Any uneven, extended cells built out from worker brood
- Whether the cell contains royal jelly, a larva, or is sealed
A torch or good daylight helps, especially when looking into open queen cups.
Why colonies build queen cells
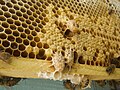
Bees build queen cells for three main reasons: swarming, supersedure or emergency queen replacement. The cell itself gives clues, but the whole colony picture is what confirms the likely cause.
Swarming
Swarming is the colony’s natural way of reproducing. The old queen leaves with a large group of workers, while the remaining bees rear a new queen.
Swarm preparation is most common when a colony is strong, crowded and expanding quickly. Lack of laying space, nectar stored in the brood nest, poor ventilation, a strong spring flow and a high proportion of young bees can all increase the pressure.
Once a colony has charged queen cells, simply adding a super may not be enough to stop it. You usually need a proper swarm control method, such as an artificial swarm or a nucleus split.
Supersedure
Supersedure is the quiet replacement of an old, damaged or poorly performing queen. The colony raises a new queen while the existing queen may still be present and laying.
Supersedure cells are usually fewer in number and often appear on the face of the comb, within the brood area. The colony is not usually trying to swarm, but you should still assess the queen’s laying pattern, age and performance before deciding what to do.
Emergency queen rearing
Emergency queen cells appear when the queen is lost suddenly. Workers use very young worker larvae and extend the existing cells into queen cells.
Emergency cells can appear scattered across the face of the comb wherever suitable young larvae were available. They are often less regular than purpose-built swarm cells. Their presence, especially with no eggs and no queen seen, suggests the colony may be queenless.
Queen cell development timing
Queen development is fast, so inspection timing matters.
A queen takes about 16 days to develop from egg to emergence:
- Day 0: egg laid
- Day 3: egg hatches into larva
- Around day 8: queen cell is sealed
- Around day 16: virgin queen emerges
If you find an open queen cell with a larva, it may be sealed within a few days. If you find sealed queen cells, you do not know exactly how old they are unless you recorded them earlier. A virgin queen could emerge within days.
With swarm cells, the prime swarm often leaves around the time the first queen cells are sealed, although poor weather can delay it. If you find sealed swarm cells and cannot find the old queen or fresh eggs, the colony may already have swarmed.
How to tell the different queen cells apart
Swarm cells
Swarm cells are the classic warning sign during spring and early summer inspections.
Typical signs:
- Often found along the lower edges of brood frames
- May also appear on frame faces, corners and side areas
- Usually several cells, sometimes many
- Large, vertical and peanut-shaped
- Often present in a strong, crowded colony
- Queen may still be present early on
- Fresh eggs may become scarce if the queen has slimmed down before swarming
A colony with multiple charged swarm cells should be treated as actively preparing to swarm. If the cells are sealed, act promptly and assume the swarm risk is high.
Supersedure cells
Supersedure cells are associated with queen replacement rather than colony reproduction.
Typical signs:
- Usually one to three cells
- Often on the face of the comb in the brood area
- Colony may be calm and not congested
- Queen may still be present
- Brood pattern may be patchy, reduced or otherwise poor
- Often linked with an older, failing or damaged queen
Do not automatically destroy supersedure cells. If the queen is failing and the colony is not showing swarm pressure, removing the only replacement cells can leave the colony worse off.
Emergency queen cells
Emergency cells are built after queen loss.
Typical signs:
- Built from existing worker cells
- Often found on the face of the comb
- May be several cells, spread across brood frames
- Can look rough, uneven or bent down from the comb face
- No queen seen and no fresh eggs
- Colony may sound more unsettled or “queenless”
- Often appears after accidental queen loss, failed manipulation or a colony being made queenless
Emergency queen rearing only works if the colony has larvae young enough to become queens. If all brood is too old, the colony cannot raise a viable queen without help.
Queen cups, charged cells and sealed cells
It is useful to use precise language in your notes.
Empty queen cups
Small acorn-like cups with nothing inside. These are common and do not necessarily mean the colony is about to swarm.
Action: record if you wish, but usually no action is needed unless they become charged.
Charged queen cells
A queen cup or cell containing an egg, larva or royal jelly. This means the bees have started queen rearing.
Action: identify whether the pattern suggests swarming, supersedure or emergency queen replacement.
Open queen cells
Cells drawn out but not sealed. A larva may be visible floating in royal jelly.
Action: re-check soon or carry out swarm control if there are multiple swarm cells.
Sealed queen cells
Closed queen cells with a textured wax cap. These are advanced.
Action: treat as urgent in a swarm-control situation. Avoid shaking frames with sealed queen cells, as developing queens can be damaged.
How to inspect for queen cells
Inspect calmly and systematically. Queen cells are easy to miss if you rush the lower frame edges or roll bees while lifting frames.
Before opening the hive
Look for clues:
- Very heavy traffic at the entrance
- Bees bearding or clustering outside in warm weather
- A strong nectar flow
- Congestion in supers or brood boxes
- Recent warm, settled weather after a poor spell
- A colony known from records to swarm early
These signs do not prove queen cells are present, but they tell you to inspect carefully.
During the brood inspection
Work through the brood nest frame by frame.
Check:
- Is the queen present?
- Are there fresh eggs?
- Are there young larvae?
- Is the brood pattern good, patchy or reduced?
- Is the brood nest congested with nectar or pollen?
- Is there enough laying space?
- Are queen cells empty, charged, open or sealed?
- How many queen cells are there?
- Where are they positioned?
- Are there signs of disease?
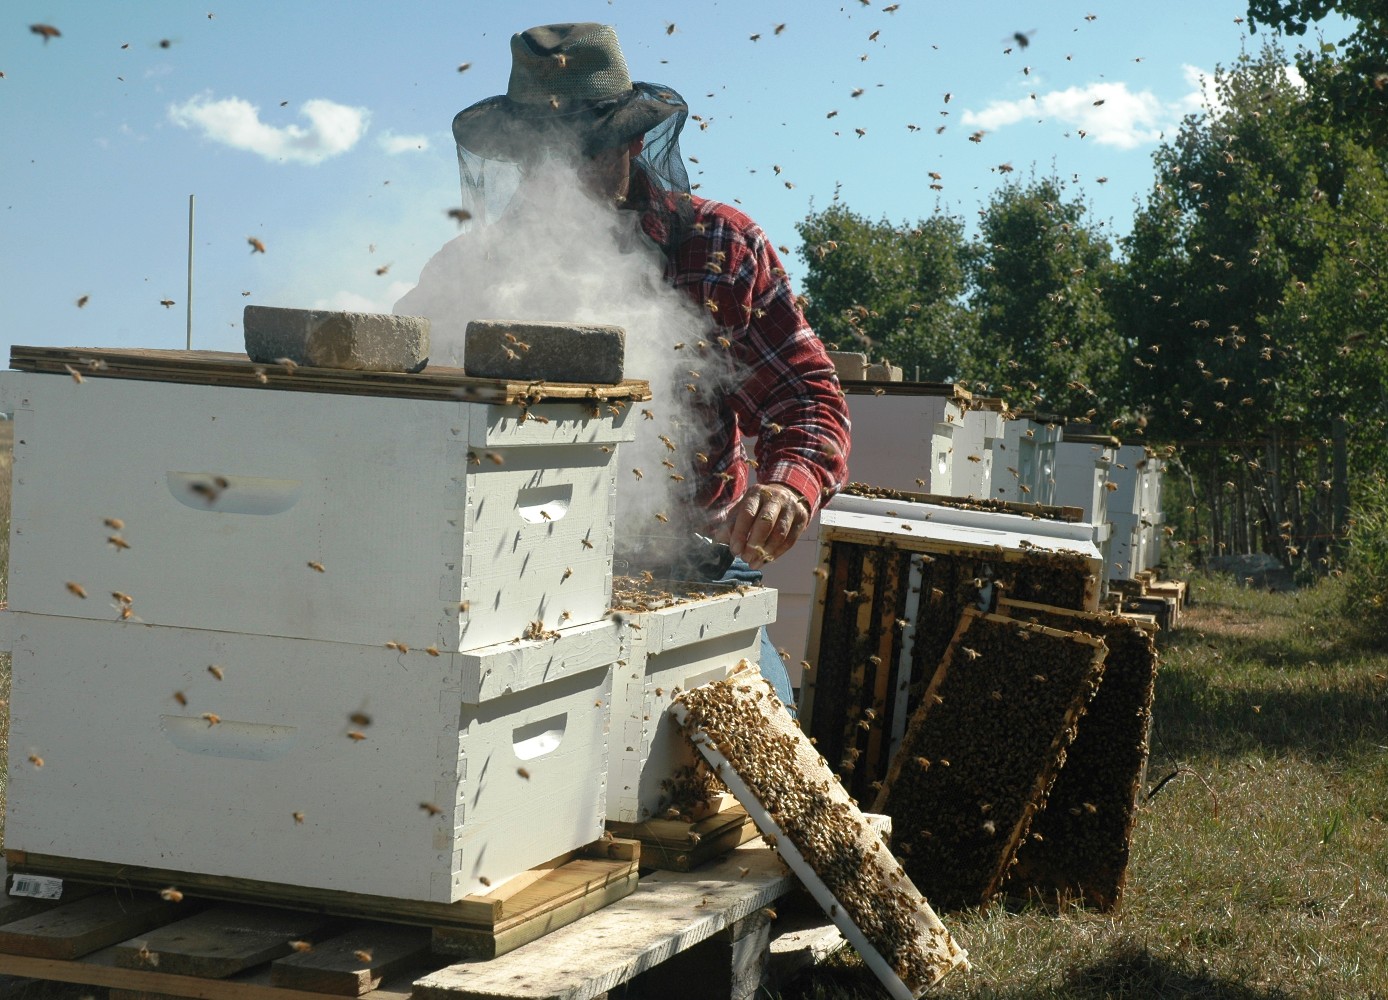
Hold each brood frame over the hive while inspecting it. Look along the bottom edge first, then scan the face of the comb. If the frame has heavy bees on it, gently move them aside with smoke or a soft shake only if there are no queen cells that could be damaged. Never shake a frame containing queen cells you intend to keep.
Take a clear photo of the whole frame and a close-up of the cell if you need to check later or ask a mentor. Adding the image to Bee Hive Tracker can make follow-up decisions much easier.
What queen cells mean and what to do next
You find empty queen cups only
If the cups are empty and the queen is present with eggs and normal laying, this is usually not urgent.
Action:
- Leave them alone
- Record “empty queen cups”
- Re-inspect on your normal schedule, or sooner in peak swarm season
You find one or two charged cells on the face of the comb
This may be supersedure, especially if the queen is old, the brood pattern is poor, or the colony is not congested.
Action:
- Confirm whether the queen is present and laying
- Assess brood pattern and colony mood
- Avoid destroying the cells unless you have a clear reason
- Re-check in 5 to 7 days
- Record cell position, stage and queen status
If you are unsure, ask an experienced beekeeper to look at the colony. Supersedure and early swarm preparation can be confused.
You find many charged cells on lower edges or across several brood frames
This is likely swarm preparation.
Action options include:
- Carry out an artificial swarm
- Make a nucleus colony
- Use another proven swarm-control method suitable for your equipment
- Provide more space as a supporting measure, but do not rely on space alone once cells are charged
Avoid simply cutting out all the queen cells and closing the hive. If the colony is in swarm mode, it will often build more cells, and you may lose the swarm before the next inspection.
You find sealed swarm cells and the queen is still present
The colony may be very close to swarming.
Action:
- Carry out swarm control promptly
- Avoid shaking frames containing sealed cells
- Decide which queen cells to keep if your method requires it
- Record exactly what you did and set a short follow-up
You find sealed queen cells and no queen or eggs
The prime swarm may already have gone, or the queen may have been lost.
Action:
- Do not destroy all queen cells
- Consider reducing to one or two good queen cells if appropriate for your management method
- Avoid repeated disturbance while a virgin queen emerges and mates
- Check for new eggs only after enough time has passed for mating, often around 2 to 3 weeks depending on weather
Poor mating weather can delay the appearance of eggs. Be patient, but keep records so the colony does not become hopelessly queenless without you noticing.
You find emergency cells after a manipulation
If you recently split the colony, removed a queen, lost a queen, or shook bees through a queen excluder, emergency cells may be expected.
Action:
- Check that the colony has enough bees, stores and suitable brood
- Decide whether to let them rear a queen or introduce a mated queen
- If introducing a mated queen, follow a proper introduction method and remove unwanted queen cells as required
- Re-check carefully according to the queen introduction or queen-rearing timetable
Practical swarm-control options
The right method depends on your equipment, experience and goal. The key is to act decisively once swarm cells are charged.
Option 1: Artificial swarm
An artificial swarm separates the old queen from the queen cells and simulates what would happen naturally.
A common approach is:
- Prepare a clean brood box, floor, crownboard and roof.
- Find the old queen.
- Place the queen on a frame of brood, with enough bees and drawn comb or foundation, in a new brood box.
- Put the queenright part on the original stand so it receives flying bees.
- Move the queenless brood box with queen cells to one side or to another suitable position.
- Ensure both parts have stores, space and suitable equipment.
- In the queenless part, manage queen cells according to your chosen method, often leaving one or two good cells.
- Record which hive has the old queen, which has queen cells, and where each box is placed.
There are several established artificial swarm methods, including Pagden-style systems. Use one method properly rather than mixing several ideas during the inspection.
Option 2: Make a nucleus colony
A nucleus split can reduce swarm pressure and create a spare colony.
Basic approach:
- Prepare a nuc box with frames and feed if needed.
- Choose frames with sealed brood, some open brood and stores.
- Add plenty of adhering young bees.
- Include either the old queen or one good queen cell, depending on your plan.
- Make sure the parent colony is not left queenless by accident.
- Move the nuc away if possible, or add extra bees if it will remain in the same apiary and flying bees may return home.
- Record frame numbers, queen status, cell status and next inspection date.
A nuc made with a queen cell depends on successful virgin emergence, mating and return. UK weather can make this unpredictable, especially early or late in the season.
Option 3: Requeen
If queen cells are due to poor queen performance, requeening may be the best option.
Consider requeening if:
- The brood pattern is persistently poor
- The queen is old or failing
- The colony is aggressive
- Supersedure attempts have failed
- You need predictable genetics or temperament
When introducing a mated queen, follow supplier instructions and check for existing queen cells. A colony with queen cells may reject an introduced queen if not prepared properly.
When to re-check
Inspection timing should match the stage of the queen cells.
As a guide:
- Empty cups only: normal inspection interval, often 7 days in swarm season
- Charged open cells: re-check in 3 to 5 days or carry out swarm control
- Sealed swarm cells: act promptly; the swarm may be imminent or may already have gone
- After an artificial swarm: follow the timetable for your chosen method
- After making a nuc with a queen cell: avoid unnecessary disturbance until emergence and mating should have occurred
- After introducing a mated queen: check acceptance and eggs according to the introduction method, commonly after 7 to 10 days
Do not keep opening a colony with a virgin queen without good reason. Virgins are quick, easily missed and vulnerable during the mating period.
What to record in Bee Hive Tracker
Good records prevent confusion, especially when several colonies are making queen cells at once.
Record:
- Hive ID and apiary location
- Date and time of inspection
- Weather conditions
- Queen seen: yes or no
- Fresh eggs present: yes or no
- Queen marked or clipped, if known
- Number of queen cells
- Cell type: swarm, supersedure, emergency or uncertain
- Cell position: lower edge, frame face, side bar, multiple frames
- Cell stage: empty cup, charged, open, sealed
- Brood pattern and amount of brood
- Available laying space
- Stores and super space
- Colony temperament
- Disease concerns, if any
- Action taken
- Photos attached
- Next inspection date and reason
The most useful record is not just “queen cells found”, but “8 charged cells on lower edges, queen seen, eggs present, artificial swarm completed, re-check parent in 7 days”. That gives you a clear plan when you return.
Common mistakes when spotting queen cells
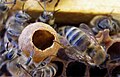
Treating empty cups as an emergency
Empty queen cups are normal. Panic action can create more problems than it solves. Look inside before deciding.
Cutting out all queen cells
Removing every cell without dealing with the cause of swarm pressure is rarely reliable. The colony may rebuild cells quickly, and you may leave it queenless if the old queen has already gone.
Missing cells on the lower frame edges
Most missed swarm cells are on bottom bars, corners or partly hidden by bees. Tilt frames carefully and inspect the edges.
Assuming sealed cells mean you still have the old queen
With swarm cells, the old queen may already have left. Always check for the queen and fresh eggs before deciding what to remove.
Shaking frames with queen cells
Shaking can damage developing queens, especially in sealed cells. If you need to remove bees, brush them gently or inspect with bees on the frame.
Inspecting too late in the interval
During peak swarm season, many UK colonies need brood inspections about every 7 days. Longer gaps can allow queen cells to be started, sealed and followed by a swarm before you return.
Disease and safety checks
Queen cell inspections are also brood inspections. Stay alert for disease signs.
Stop and seek advice if you see:
- Sunken, greasy or perforated brood cappings
- Ropy larval remains
- Scales in cells
- Twisted, melted or discoloured larvae
- Unusual smells
- Patchy brood patterns that cannot be explained
American foulbrood and European foulbrood are notifiable diseases in the UK. If you suspect either, contact the National Bee Unit or your local bee inspector and avoid moving brood, bees or equipment until advised.
Use clean tools, avoid unnecessary transfer of frames between colonies, and record queen or nuc sources. Good hygiene is part of swarm control because manipulations often involve moving brood and bees.
UK seasonal notes
In much of the UK, the main swarm season runs from April to June, often peaking in May. Local conditions vary. Colonies in sheltered or urban sites may start earlier, while colder or upland areas may be later.
Be especially watchful:
- After several warm days in spring
- During strong nectar flows
- When brood boxes become nectar-bound
- When supers are full or not being used
- In colonies with young, prolific queens
- In apiaries with a history of early swarming
- After poor weather confines a strong colony indoors
Late queen cells can still occur in July or beyond, but late-season queen replacement carries more mating risk as drones decline and weather becomes less reliable.
When to get help
Ask for help if:
- You cannot tell whether cells are swarm, supersedure or emergency cells
- You cannot find the queen and need to make a quick decision
- Several colonies are making swarm cells at once
- You suspect notifiable brood disease
- You are about to do your first artificial swarm
- The colony has been queenless for several weeks with no eggs
A local association mentor or experienced beekeeper can often solve in ten minutes what is difficult to diagnose from notes alone. Photos and accurate Bee Hive Tracker records make that conversation much more useful.
Practical next steps after finding queen cells
Before leaving the apiary, make sure you have done three things:
- Identified the likely reason for the cells: swarm, supersedure, emergency or uncertain.
- Taken an appropriate action or made a deliberate decision to leave them.
- Recorded the cell stage, queen status, action taken and next inspection date.
Queen cells are not a problem by themselves. They are information. Read them correctly, match your action to the colony’s condition, and keep records tight enough that your next inspection is planned rather than reactive.
Sources Used
- https://www.nationalbeeunit.com/
- https://www.bbka.org.uk/
- https://www.gov.uk/guidance/bee-health