How to Tell the Difference Between Swarm Cells and Supersedure Cells
If a colony is preparing to swarm, you will usually find several charged queen cells, often along the lower edges or side edges of brood frames, with a strong population and signs of congestion. Supersedure cells are more often one or two well-formed cells on the face of a brood frame, with the old queen still present but laying poorly.
That is the useful short answer, but queen cell position alone is not enough. Always judge the whole colony: number of cells, where they are, whether they contain larvae or are capped, the brood pattern, the queen’s condition, available space, season and colony strength.
Getting this right matters. Treating genuine supersedure as swarm preparation can disrupt a colony that is quietly replacing a failing queen. Treating swarm preparation as supersedure can mean losing the old queen and a large swarm.
The three main reasons bees build queen cells
Honey bees raise new queens for three different reasons.
Swarming
Swarming is colony reproduction. The old queen leaves with a large proportion of the flying bees, and the original hive raises a new queen from queen cells left behind. This is most common in spring and early summer when colonies are expanding quickly.
Supersedure
Supersedure is queen replacement. Workers raise a new queen because the current queen is ageing, damaged, poorly mated or laying badly. The colony usually does not intend to swarm. In many cases the old queen and new queen may overlap briefly until the new queen is accepted.
Emergency queen rearing
Emergency cells are built after sudden queen loss. Workers choose suitable young worker larvae and convert them into queens. These cells can look less regular because they are often drawn from existing worker cells rather than planned from the start.
When to expect queen cells in the UK
The main UK swarm season is usually April to June, with many areas seeing the highest risk in late May and early June. Weather, forage and local conditions make a big difference. A strong spring nectar flow, warm settled days, crowded brood boxes and fast colony build-up all increase swarm pressure.
Secondary swarms can occur later, particularly in July, and occasionally into August if conditions are favourable.
Supersedure can happen at almost any time of year, although it is often noticed after winter losses, following queen damage, after poor mating, or when brood patterns deteriorate. Emergency queen rearing can happen whenever a queen is lost, but success depends on there being young larvae, suitable weather for mating flights, and enough drones in the area.
Swarm cells: what they usually look like
Swarm cells are queen cells made as part of the colony’s swarming process. They are often described as “peanut-shaped” because they hang down from the comb and have a textured surface.
Typical signs of swarm cells include:
- Several queen cells, often more than four and sometimes a dozen or more
- Cells along the bottom bars or lower edges of brood frames
- Cells on side edges or lower areas of several adjacent brood frames
- A strong, crowded colony with many bees
- Limited space for the queen to lay
- Nectar or pollen filling cells in the brood nest
- Reduced laying if the queen is being slimmed down before swarming
- Queen cells at different stages, including open charged cells and capped cells
A charged queen cell contains a larva in royal jelly. Empty queen cups, sometimes called play cups, are common and do not prove the colony is preparing to swarm.
A colony may swarm around the time the first queen cell is sealed, weather permitting. If you find capped swarm cells in a strong colony, assume the situation is urgent.
Supersedure cells: what they usually look like
Supersedure cells are raised to replace a queen, not to divide the colony.
Typical signs of supersedure include:
- One or two queen cells, occasionally three
- Cells on the face of a brood frame rather than mainly along the bottom edge
- Cells positioned within or close to the brood area
- The old queen still present
- Patchy brood, missed cells, drone brood in worker cells, or reduced laying
- Normal external hive activity, without obvious swarm pressure
- Adequate space in the brood nest
Supersedure cells are often well fed and well shaped. They are not necessarily smaller than swarm cells. The most reliable clue is the context: few cells, a queen still present, and evidence that she is not performing well.
Emergency queen cells: how they differ
Emergency cells can be confused with both swarm and supersedure cells. They are usually built after the queen has been lost unexpectedly.
Typical signs of emergency queen cells include:
- No queen found, and no fresh eggs after careful inspection
- Queen cells drawn from existing worker cells on the face of the comb
- Cells that may appear less tidy or more uneven
- A sudden break in egg laying
- Agitated or unsettled behaviour in a queenless colony
- Several cells of mixed quality, depending on the age of larvae available
If you see eggs, the queen was present within the last three days, though she may no longer be there. If there are no eggs and only older larvae or sealed brood, queenlessness may have been present for longer.
Queen cups are not the same as queen cells
Many colonies build empty queen cups in spring. These are small acorn-like cups, usually along the edges of comb. They are part of normal colony preparation and do not necessarily mean anything will happen.
During inspection, check whether the cup is charged:
- Empty cup: no immediate action needed unless other signs suggest swarm pressure
- Egg in cup: watch closely, but still assess the whole colony
- Larva in royal jelly: active queen rearing has started
- Capped queen cell: queen emergence is approaching, and swarm risk may already be high
Avoid destroying every cup automatically. It wastes time and can make inspections more disruptive without solving the underlying cause of swarming.
The key differences at a glance
Use these comparisons as a guide, not as absolute rules.
Swarm cells usually show:
- Many cells
- Often on lower frame edges or side edges
- Strong, populous colony
- Congested brood nest
- Queen may still be present but laying less
- Most common in spring and early summer
- Requires swarm-control action
Supersedure cells usually show:
- One or two cells
- Usually on the face of a brood frame
- Queen often still present
- Poor or patchy laying pattern
- Colony may otherwise seem calm and settled
- Can occur at many times of year
- Often best left alone unless you intend to requeen
Emergency cells usually show:
- Queen absent or suspected absent
- Cells made from worker cells on the face of comb
- Sudden break in eggs and young brood
- Colony may seem unsettled
- Success depends on larval age, drones and mating weather
- May need beekeeper intervention
How to inspect queen cells properly
Inspect calmly and methodically. Queen cells are easy to miss, especially along frame edges or where bees are thick on the comb.
Choose a warm, settled part of the day where possible, ideally when many flying bees are out. Avoid opening brood nests in cold, wet or windy conditions unless the situation is urgent.
Before opening the hive
Have ready:
- Hive tool
- Smoker, used lightly
- Spare brood box, nuc box or equipment if swarm control may be needed
- Queen cage or clip if you may need to secure the queen
- Notebook, inspection sheet or Bee Hive Tracker record
- Phone or camera for clear frame photos
During the inspection
Work through the colony in a consistent order.
- Check the supers and available space above the brood nest.
- Remove an outside frame first to create working space.
- Inspect each brood frame carefully, including the lower edge and both side edges.
- Shake or gently brush bees only if necessary to confirm queen cells; avoid shaking frames that contain charged or capped queen cells unless you are deliberately removing them.
- Note whether cells are empty cups, charged open cells or capped cells.
- Look for the queen, but also check for eggs and the quality of the brood pattern.
- Record the frame number, position and number of queen cells before taking action.
A photograph is often the best record. Take one showing the whole frame face and another close-up of the queen cell. In Bee Hive Tracker, attach the image to the inspection note and set the follow-up date while you are still at the hive.
Queen cell timing: why speed matters
Queen development takes about 16 days from egg to emergence.
Practical timings:
- Day 0: egg laid
- Around day 3: egg hatches into a larva
- Around day 8 from egg laying: queen cell is sealed
- Around day 16: virgin queen emerges
These timings vary slightly with conditions, but they are close enough for practical swarm control.
The key point is this: once swarm cells are sealed, the old queen may already have left or may leave very soon if weather allows. Do not assume you have a week to decide.
If you find open charged swarm cells, inspect again or act within a few days. If you find sealed swarm cells, act promptly.
What to do if they are swarm cells
If the signs point to swarming, do not rely on knocking down queen cells. A colony with strong swarm impulse will often rebuild them quickly, and you may miss one. Removing cells without dealing with the cause can leave you with a swarm anyway, or worse, a queenless colony with no viable queen cells.
Common options include:
Artificial swarm
An artificial swarm aims to mimic natural swarming while keeping the bees under your control. The usual principle is to separate the old queen from most of the brood and queen cells, while flying bees return to a chosen hive position.
There are several versions, including the Pagden method. Follow a method you know well, or use your local association’s preferred version. The important points are:
- Find and secure the old queen
- Ensure the queenright part has space to draw comb and lay
- Ensure the queenless part has suitable queen cells or is given a controlled requeening plan
- Reinspect at the correct interval so you do not leave too many queen cells to produce casts
Make up a nucleus colony
For many newer beekeepers, making a nuc with the old queen is a practical way to reduce swarm pressure.
A typical nuc may include:
- The old queen on a frame of brood
- One or two additional brood frames, depending on strength and weather
- A frame of stores
- Enough bees to cover the brood
- Space to expand
The parent colony is left with queen cells to raise a replacement queen, or you can introduce a mated queen if that suits your plan. Check food levels carefully, especially if the nuc is moved or weather turns poor.
Demaree or Snelgrove methods
These methods can control swarming while keeping the colony productive, but they require careful frame arrangement and follow-up inspections. They are useful for experienced beekeepers, especially where maintaining a strong foraging force is important.
Adding space
Extra supers, drawn comb and improved brood nest space can help reduce pressure before swarm cells are charged. Once charged queen cells are present, adding space alone is rarely enough.
What to do if they are supersedure cells
If the colony appears to be superseding, the best action is often to leave it alone.
Interfering with supersedure can remove the colony’s chosen replacement and leave it worse off. If there are one or two good cells, the queen is still present, and there is no sign of swarm pressure, give the bees time.
You may choose to intervene if:
- You want to introduce a queen from known stock
- The colony has undesirable traits such as aggression
- The season is too late for reliable mating
- The colony is weak and unlikely to requeen successfully
- Disease or drone-laying is suspected
If you allow supersedure, record the cell position and check again in 7 to 10 days. Avoid repeatedly disturbing the colony during queen emergence and mating. After a virgin queen emerges, it can take two to three weeks, sometimes longer in poor weather, before you see a reliable pattern of eggs.
What to do if they are emergency queen cells
First decide whether the colony really is queenless. Look carefully for eggs, young larvae and the queen herself. If uncertain, an experienced beekeeper may use a test frame containing eggs and young larvae from a healthy colony, provided disease risk is low and the donor colony is suitable.
Options include:
- Let the colony raise a queen if the season, drones and weather are favourable
- Introduce a mated queen
- Unite with a queenright colony
- Make up or combine nucs to preserve bees and brood
Emergency queens can be successful, but quality depends on the age of larvae chosen and the conditions for mating. Late-season emergency requeening in the UK is more risky because drone numbers and mating weather may be poor.
Common mistakes to avoid
Judging by position alone
Bottom-edge cells often suggest swarming, but bees do not read textbooks. Always combine position with number of cells, queen status, brood pattern and colony strength.
Destroying all queen cells
If you remove every queen cell and the old queen has gone, the colony may be left hopelessly queenless. Before cutting anything out, confirm the queen is present or that you have another requeening plan.
Inspecting too late in swarm season
During the main swarm period, strong colonies may need inspecting about every seven days. A 10 to 14 day gap can be too long if the colony is already preparing to swarm.
Leaving too many queen cells after swarm control
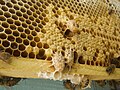
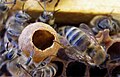
If a queenless colony is left with many capped cells, it may throw casts with virgin queens. Many beekeepers reduce cells to one or two good queen cells, depending on the method being used and their confidence in cell quality.
Disturbing a newly mated queen too soon
After queen emergence, give the new queen time to mate and start laying. Too much disturbance during this period can be counterproductive.
What to record at each inspection
Good records make swarm control much easier because you can see what changed since the last inspection.
Record at minimum:
- Hive ID and apiary
- Date and weather
- Colony strength
- Available space in brood box and supers
- Queen seen or not seen
- Eggs present or absent
- Brood pattern quality
- Number of queen cells
- Whether cells are empty, charged or capped
- Exact frame positions
- Suspected reason: swarm, supersedure or emergency
- Action taken
- Follow-up date
A useful note might read:
“Hive 3, 24 May. Queen seen, eggs present but reduced. Strong colony, brood nest crowded. 9 charged queen cells, 4 capped, mostly bottom edges frames 4 to 7. Likely swarm preparation. Artificial swarm completed. Recheck parent colony in 5 days.”
This level of detail prevents guesswork at the next visit. Bee Hive Tracker is useful here because you can attach photos, tag queen cell positions and set reminders for the next inspection.
Practical examples
Example 1: likely swarm cells
Late May. A strong colony is packed with bees, with bees hanging under the crownboard and nectar being stored around the brood nest. There are 12 queen cells across four brood frames, mostly along lower edges, with several capped.
Likely diagnosis: swarm preparation.
Sensible action: carry out swarm control promptly, such as an artificial swarm or making a nuc with the old queen. Record which frames had cells and when the follow-up inspection is due.
Example 2: likely supersedure
Mid-July. The queen is present but the brood pattern is patchy. There is one large, well-fed queen cell on the face of a central brood frame. The colony has enough space and shows no obvious swarm pressure.
Likely diagnosis: supersedure.
Sensible action: leave the cell alone unless you have a planned requeening reason. Recheck gently in 7 to 10 days, then allow time for mating and new laying.
Example 3: likely emergency queen rearing
A colony has no visible queen, no eggs, and several queen cells drawn from worker cells on the face of the comb. The bees are noisier than usual and the youngest larvae are already several days old.
Likely diagnosis: emergency queen rearing.
Sensible action: consider introducing a mated queen, uniting with another colony, or seeking advice from a mentor. If letting them continue, check that the season and drone availability make mating realistic.
Disease and biosecurity cautions
If you see irregular brood, sunken or perforated cappings, ropy larvae, unpleasant smells, or anything that suggests European foulbrood or American foulbrood, stop moving frames between colonies and seek official advice.
In the UK, suspected notifiable disease should be reported to your local bee inspector or the National Bee Unit. Do not sell, move or unite suspect colonies until you have guidance.
Also avoid casually transferring comb between colonies unless you are confident about disease status. Queen cells, brood frames and nucs can all move pathogens as well as bees.
When to ask for help
Ask an experienced local beekeeper, mentor or association officer if:
- You are unsure whether the colony is swarming or superseding
- You cannot find the queen and there are capped queen cells
- You have not carried out an artificial swarm before
- The colony is aggressive or difficult to inspect
- You suspect foulbrood or another serious brood disease
- It is late in the season and the colony is queenless
A second opinion at the hive is often worth far more than trying to decide from memory later.
Final rule of thumb
Many queen cells on frame edges in a strong, crowded colony usually mean swarming. One or two cells on the face of the brood comb, with a failing queen still present, usually mean supersedure. Irregular cells after queen loss suggest emergency queen rearing.
But the safest decision comes from the full picture: cell number, cell position, brood pattern, queen status, colony strength, timing and recent inspection history. Record those details every time, and queen cell decisions become far more reliable.
Sources Used
No external URLs were provided in the research notes. This guide is based on established UK beekeeping practice and field experience. For official guidance on notifiable diseases and disease reporting, consult your local bee inspector or the National Bee Unit.