How to Fix Laying Workers
A colony with true laying workers should be treated as queenless, difficult to requeen, and time-sensitive. First confirm the diagnosis from the egg pattern, brood pattern and recent colony history. Then choose the most realistic remedy:
- Unite it with a strong queenright colony by newspaper, which is usually the simplest and most reliable option.
- Make a fresh nuc from healthy brood and introduce a mated queen, while disposing of or uniting the laying-worker colony.
- Rehabilitate the colony with open worker brood before attempting to requeen, which can work but takes time and resources.
Do not simply post a new queen into a hive full of laying workers. She is very likely to be killed.
What are laying workers?
Laying workers are worker bees whose ovaries have developed after a colony has been queenless and short of brood pheromone for a period of time. Workers cannot mate, so their eggs are unfertilised and develop into drones.
A few workers with active ovaries can become many. Once that happens, the colony may behave as if it has a “queen signal” even though there is no proper queen. This is why laying-worker colonies can reject a new queen so aggressively.
Laying workers are most often seen when:
- A queen has died or disappeared.
- A virgin queen has failed to return from mating.
- A swarm or artificial swarm has left a colony queenless for too long.
- A beekeeper has missed failed queen replacement during poor weather.
- A small nuc has lost its queen and been left unchecked.
Diagnosis: laying workers or a poor queen?

Correct diagnosis matters. A failing queen, a newly mated queen, a drone-laying queen and true laying workers can look similar at first glance.
Signs of true laying workers
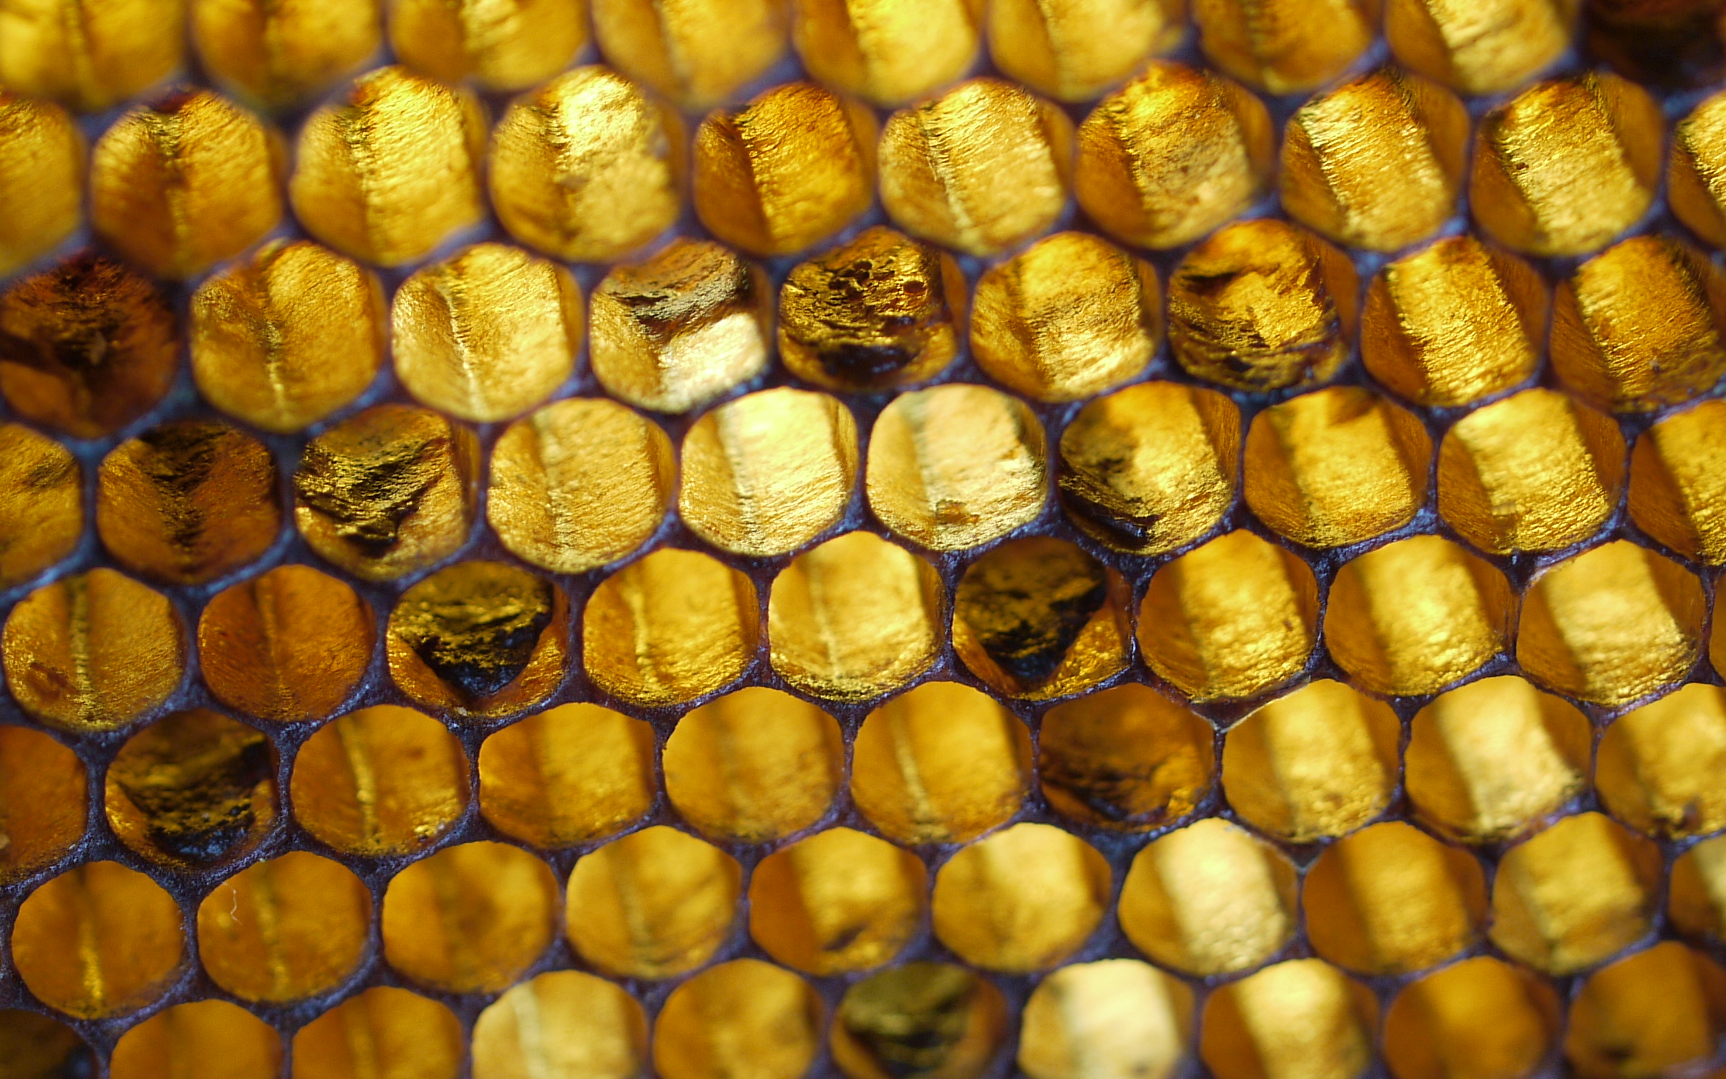
Look for several of the following signs together:
- Several eggs in one cell.
- Eggs stuck to cell walls rather than neatly placed at the bottom.
- Eggs at different stages in the same cell.
- Drone brood in worker-sized cells, often with domed cappings.
- A very patchy brood pattern.
- Little or no proper worker brood.
- No queen found after a careful inspection.
- No normal pattern of single eggs in the base of worker cells.
Multiple eggs alone are not conclusive. A newly mated queen may lay more than one egg per cell for a short time, but her eggs are usually placed at the bottom of the cell and the pattern should improve quickly.
Signs of a drone-laying queen
A drone-laying queen is different from laying workers. She may be unmated, poorly mated, running out of sperm, or damaged. Typical signs include:
- Usually one egg per cell.
- Eggs placed more neatly in the bottom of the cell.
- Drone brood in worker cells.
- A queen may be present.
- The brood pattern may be poor but more organised than with laying workers.
If a drone-laying queen is present, find and remove her before requeening or uniting.
Timing clues from brood
Brood age helps you work out when the colony last had a functioning queen.
- Eggs hatch after about 3 days.
- Worker brood is capped around day 9 from egg laying.
- Worker bees emerge around day 21.
- Drone brood is capped around day 10 and emerges around day 24.
If you see eggs or young worker larvae in a normal pattern, the colony probably had a laying queen within the last few days.
If you see only capped worker brood, the queen may have been lost 9–21 days ago, depending on the brood age.
If you see only drone brood in worker cells, with multiple eggs and no worker brood, laying workers are likely.
Inspect carefully before taking action
Use light smoke and work steadily. Laying-worker colonies are often weak, unsettled or defensive, so avoid shaking the colony unnecessarily during diagnosis.
Check two or three central brood frames and record:
- Number of eggs per cell.
- Whether eggs are on the cell base or walls.
- Amount of worker brood.
- Amount of drone brood in worker cells.
- Whether any queen is seen.
- Presence of queen cells.
- Stores, temperament and colony strength.
Photos are useful because laying-worker diagnosis is often easier when you can compare frames over time. Add the inspection notes and frame photos to Bee Hive Tracker so your follow-up dates and decisions are not based on memory.
Check for disease before moving bees or combs
Before uniting colonies or moving brood frames, inspect for disease.
American foulbrood and European foulbrood are notifiable in the UK. If you see suspicious brood, stop and seek advice from your local Bee Inspector or the National Bee Unit.
Warning signs include:
- Sunken, perforated or greasy-looking cappings.
- Patchy brood with dead larvae.
- Ropy larval remains.
- Dark scales in cells.
- Sour or unpleasant brood smell.
- Twisted or melted-looking larvae.
Do not unite, transfer frames, or move suspect equipment between apiaries until disease has been ruled out.
Choose the right fix
The best option depends on the season, colony strength, whether you have a spare mated queen, and how valuable the receiving colony is.
As a rule:
- If you have a strong queenright colony, unite.
- If it is spring or early summer and you have spare brood, make a nuc.
- If you have several strong donor colonies and time, try rehabilitation with open brood.
- If it is late in the season, unite rather than gamble on a difficult requeen.
Option 1: Unite with a strong queenright colony by newspaper
This is usually the most reliable solution for a confirmed laying-worker colony.
When to use this method
Use a newspaper unite when:
- You have a strong, healthy, queenright colony.
- The laying-worker colony is not diseased.
- You do not need to preserve the failing colony as a separate unit.
- It is too late or too risky to rear a new queen.
- You want to save the bees and stores rather than lose the colony completely.
Avoid using a very valuable breeder queen as the receiver unless you are confident. Although newspaper unites usually work well, laying-worker bees can be hostile to queens.
Why it works
The strong queenright colony has a proper queen pheromone and brood pheromone balance. Slow mixing through newspaper reduces fighting and gives the laying-worker bees time to become part of the queenright colony.
Step-by-step newspaper unite
- Inspect the receiving colony first. Confirm it is queenright, healthy, strong and has enough stores.
- Inspect the laying-worker colony for disease. Do not proceed if anything looks suspicious.
- Choose an evening or a time when flying has reduced.
- Place the strong queenright colony in the bottom position.
- Remove the roof and crownboard from the receiving colony.
- Lay one sheet of newspaper over the top bars. Make a few small slits or pinholes.
- Place the brood box from the laying-worker colony above the newspaper.
- Close the hive with crownboard and roof.
- Leave the colony alone for several days while the bees chew through the paper and mix.
- Inspect after about 5–7 days. Check that the queenright colony is calm and that the queen is safe.
- At the next inspection, remove surplus combs, damaged comb, excess drone brood and empty boxes as needed.
After the unite
Do not over-inspect immediately. Once the bees are combined, your aim is to confirm that the queen is laying normally and that the colony is settling.
Record:
- Date of unite.
- Hive ID of the laying-worker colony.
- Hive ID of the receiving colony.
- Queen details of the receiving colony.
- Disease check result.
- Follow-up inspection date.
- Brood pattern after uniting.
Bee Hive Tracker is useful here because unites can become confusing later in the season if hive identities, queen histories and frame movements are not recorded at the time.
Pros and cons
Pros:
- Fast and practical.
- High chance of saving the bees.
- No need to buy a queen.
- Good late-season option.
Cons:
- You lose the colony as a separate unit.
- Not suitable if disease is suspected.
- Not ideal if the receiving colony is weak.
- There is some risk to the receiving queen, especially if the laying-worker colony is strong and aggressive.
Option 2: Make a fresh nuc and introduce a mated queen
This option is useful when you want to maintain colony numbers, but it is better to think of it as building a new colony rather than “fixing” the old one directly.
A proper nuc made from healthy brood, nurse bees and a mated queen has a much better chance than trying to introduce a queen straight into a laying-worker hive.
When to use this method
Use this method when:
- It is spring, early summer or mid-summer.
- You have access to healthy donor colonies.
- You have a mated queen available.
- You can spare brood and nurse bees without weakening your good colonies.
- There is enough season left for the nuc to build up.
Step-by-step nuc method
- Prepare a clean nuc box with frames ready.
- From healthy donor colonies, add:
- One frame of emerging brood.
- One frame of young open brood if available.
- One frame of stores.
- One frame of drawn comb or foundation.
- Keep adhering nurse bees on the brood frames, provided you are not moving the donor queen.
- Add extra young bees if needed by shaking bees from brood frames in a healthy donor colony, after first confirming the queen is not on the frame.
- Move the nuc to a suitable stand and reduce the entrance.
- Feed lightly with 1:1 syrup if there is little nectar coming in.
- Introduce a mated queen in a cage.
- Do not rush release. Check after 2–3 days that bees are calm around the cage before allowing release.
- Check for eggs 7–10 days after introduction.
- Check for worker brood pattern after 2–3 weeks.
What to do with the laying-worker colony
Do not add the laying-worker bees directly to the new nuc in large numbers. They may kill the introduced queen.
Instead, either:
- Unite the laying-worker colony with a strong queenright colony by newspaper, or
- Shake the bees out in front of strong colonies and remove the old hive so returning bees beg their way into queenright colonies.
Shaking out is not a magic cure on its own. Laying workers can fly. Its main purpose is to break up the failing colony and stop bees returning to the same queenless box.
Pros and cons
Pros:
- Maintains colony numbers.
- Gives the new queen a much better acceptance environment.
- Useful in spring and summer.
- Allows you to select good queen stock.
Cons:
- Requires brood, nurse bees and a mated queen.
- Takes time.
- Can weaken donor colonies if overdone.
- Less suitable late in the season.
Option 3: Rehabilitate with open brood before requeening
This is the slower, more resource-heavy option. It can work, but it is not the first choice for most beekeepers.
The idea is to add frames of open worker brood from healthy colonies over several weeks. Open brood pheromone can help suppress worker ovary development and may make the colony more willing to accept a queen later.
When to consider this method
Consider brood rehabilitation when:
- It is spring or early summer.
- The colony still has enough bees to cover brood.
- You have strong donor colonies.
- You can spare frames of eggs and young larvae.
- You are prepared to inspect on schedule.
- You do not have an immediate strong colony to unite with.
Avoid this method if the colony is very weak, diseased, short of bees, or if the season is too late.
Step-by-step brood rehabilitation
- Confirm there is no queen present.
- Remove the worst drone-brood combs if they are no longer useful.
- Add one frame containing eggs and young worker larvae from a healthy donor colony.
- Ensure the donor queen is not on the frame.
- Place the frame in the centre of the brood nest.
- Feed if forage is poor.
- Return in 7 days.
- If the colony has not produced sensible queen cells and still shows laying-worker signs, add another frame of open brood.
- Repeat weekly for 2–3 weeks if the colony is strong enough.
- Once the laying-worker signs reduce and the bees are more settled, introduce a mated queen in a cage or use a good queen cell if conditions are suitable.
Important caution
This method consumes valuable brood from good colonies. If it fails, you may weaken several good hives while still losing the laying-worker colony.
If the colony is not improving after two rounds of open brood, unite it and move on.
Pros and cons
Pros:
- Can suppress laying-worker behaviour.
- May allow later queen acceptance.
- Useful when trying to recover a colony during spring.
Cons:
- Slow.
- Uses brood from good colonies.
- Acceptance is not guaranteed.
- Poor option late in the season.
What not to do
Do not introduce a queen straight into a confirmed laying-worker colony. She will often be balled and killed.
Do not keep adding queens and hoping one survives. Repeated failed introductions are expensive and usually indicate the colony environment has not been corrected.
Do not transfer brood or combs before checking for disease.
Do not assume multiple eggs always mean laying workers. A new queen can lay untidily for a short period.
Do not leave a laying-worker colony indefinitely. It will dwindle as drones replace workers and the adult bee population ages.
Do not try complex recovery late in autumn unless you have the bees, stores, weather and experience to carry it through. In most late-season cases, uniting is kinder and more successful.
How to judge whether the fix has worked
First week
Look for:
- Queen alive if one was introduced.
- Bees calm around the queen cage.
- No balling of the queen cage.
- Eggs appearing in a normal pattern.
- No fresh multiple eggs on cell walls.
If you have united colonies, keep the first check brief. Confirm the queenright colony is stable and avoid disrupting the brood nest too much.
Weeks two and three
Look for:
- Single eggs in the base of cells.
- Young worker larvae in a compact area.
- Capped worker brood from around day 9 after eggs are laid.
- Improving brood pattern.
- Normal worker brood rather than drone brood in worker cells.
- A calmer colony temperament.
After three weeks
By three weeks, you should have a clearer answer. A successful fix should show a proper worker brood pattern.
If there is still only drone brood, consider:
- A drone-laying queen.
- A failed queen introduction.
- Continued laying-worker activity.
- A virgin queen that failed to mate.
- A queen that has been killed.
At that point, uniting is often the best next step.
Seasonal advice for UK beekeepers
Spring
Spring is the best time to recover from laying workers, provided the weather is suitable and colonies are strong enough to donate brood. Mated queens may still be limited early in the season, so plan carefully.
Good options:
- Make a nuc with a bought or overwintered queen.
- Rehabilitate with open brood if you have strong donors.
- Unite if the colony is weak.
Early and mid-summer
This is usually the most flexible period. Colonies are stronger, brood is available, and mated queens are easier to source.
Good options:
- Newspaper unite.
- Make a replacement nuc.
- Requeen after brood rehabilitation.
Watch for nectar gaps. A nuc or recovering colony may still need feeding if forage dries up.
Late summer
Be realistic. The colony needs enough time to build winter bees and stores. If the rescue attempt is uncertain, unite with a strong colony rather than risk losing bees and equipment value.
Good options:
- Unite with a strong queenright colony.
- Make a nuc only if you have a proven mated queen, enough bees and a clear feeding plan.
Autumn and winter
A laying-worker colony found late is rarely worth complex manipulation. Requeening is difficult, brood production is limited, and the colony may not build enough winter bees.
Best option:
- Unite with a healthy queenright colony if disease has been ruled out.
Records to keep
Good records turn a frustrating queen problem into useful information for future decisions.
At diagnosis, record:
- Hive ID.
- Apiary site.
- Date and weather.
- Colony strength.
- Whether a queen was seen.
- Brood pattern.
- Egg pattern.
- Drone brood in worker cells.
- Disease checks.
- Photos of suspect frames.
At intervention, record:
- Action taken: unite, nuc, brood rehabilitation or shake-out.
- Donor and receiving hive IDs.
- Queen origin and marking.
- Queen introduction method.
- Frames moved.
- Feed given.
- Follow-up dates.
At follow-up, record:
- Queen seen or not seen.
- Eggs present or absent.
- Worker brood pattern.
- Drone brood level.
- Temperament.
- Stores.
- Any further action needed.
Bee Hive Tracker can be used to attach brood photos, set 7-day, 14-day and 21-day reminders, and keep the history of queen events tied to the correct hive ID. This is particularly helpful where colonies have been united or nucs have been made from several donor hives.
Practical kit to have ready
Useful items include:
- Spare nuc box.
- Spare brood box.
- Clean drawn comb or foundation.
- Newspaper for uniting.
- Queen cages.
- Mated queens or access to a reliable supplier.
- Syrup feeder.
- Fondant if needed.
- Hive tool and smoker.
- Queen marking records.
- Hive labels or tags.
- Phone or camera for brood photos.
- Bee Hive Tracker set up with current hive IDs.
Common mistakes and better choices
Mistake: assuming it is laying workers too quickly
Better choice: Check egg position, brood type, queen status and timing. If unsure, take photos and recheck in 7 days.
Mistake: introducing a queen immediately
Better choice: Unite, make a proper nuc, or suppress laying-worker behaviour with open brood first.
Mistake: weakening good colonies to save a hopeless one
Better choice: If the laying-worker colony is small and failing, unite it. Protect your productive colonies.
Mistake: moving suspect brood
Better choice: Stop and seek Bee Inspector advice if brood disease is possible.
Mistake: no timed follow-up
Better choice: Set inspection reminders at the time of intervention. Queen fixes depend on timing.
Mistake: trying to preserve colony identity at all costs
Better choice: Prioritise colony welfare. A successful unite is often better than repeated failed queen introductions.
Quick decision checklist
- Inspect carefully and confirm the signs.
- Rule out notifiable brood disease before moving frames or bees.
- If a queen is present and laying only drones, remove her and treat as a queen problem rather than true laying workers.
- If the colony has true laying workers and you have a strong queenright colony, unite by newspaper.
- If you want to maintain colony numbers and have spare brood and a mated queen, make a fresh nuc.
- If it is spring or early summer and you have strong donor colonies, consider open-brood rehabilitation.
- If it is late season, unite unless you have a very strong reason not to.
- Record the action and set follow-up checks.
Final practical advice
Laying workers are not fixed by optimism or by repeatedly sacrificing queens. The colony environment has to change.
For most UK beekeepers, the best answer is simple: confirm the diagnosis, check for disease, then unite with a strong queenright colony. If the season is favourable and you have enough resources, build a fresh nuc with healthy brood and a mated queen.
After any intervention, inspect on a schedule:
- 7 days: queen alive, eggs or signs of acceptance.
- 14 days: young worker brood developing.
- 21 days: clearer worker brood pattern and colony direction.
If a method fails twice, change strategy. In many cases, uniting saves the bees and prevents a weak, queenless colony from draining time and resources from the rest of the apiary.
Sources Used
- National Bee Unit and BeeBase guidance on brood disease recognition, notifiable disease procedure and contacting local Bee Inspectors.
- British Beekeepers Association and local association training guidance on queenlessness, requeening and colony uniting.
- Practical UK beekeeping experience and standard apiary practice.